-
Book Overview & Buying
-
Table Of Contents
-
Feedback & Rating

Raspberry Pi 3 Projects for Java Programmers
By :

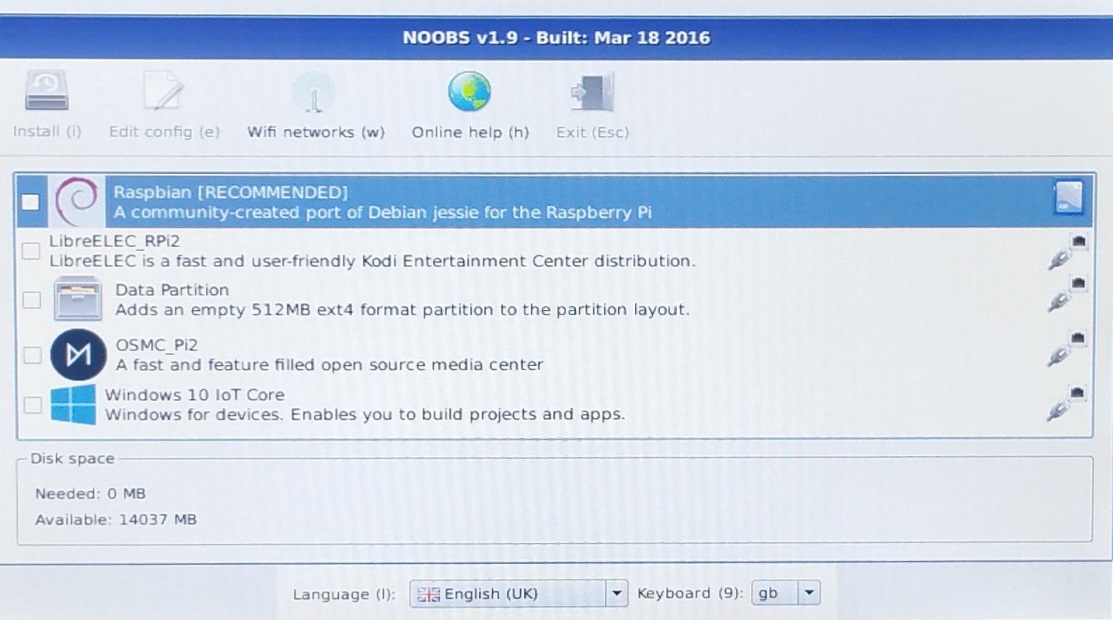
To install Raspbian, we need to get the Raspberry Pi ready for use. As the Raspberry Pi has no power on and off button, the powering of the Raspberry Pi will be done as the last step:
Language
and Keyboard
drop-down menus. Make sure you select the appropriate language and keyboard selection; otherwise, it will be difficult to enter the right characters on the command line and in other tools requiring text input.
Raspbian [RECOMMENDED]
option and click the Install (i)
button to start installing the OS:It is safe to press Yes to start the installation. This installation will take a couple of minutes, so it is a good time to go for a second cup of coffee.
Ok
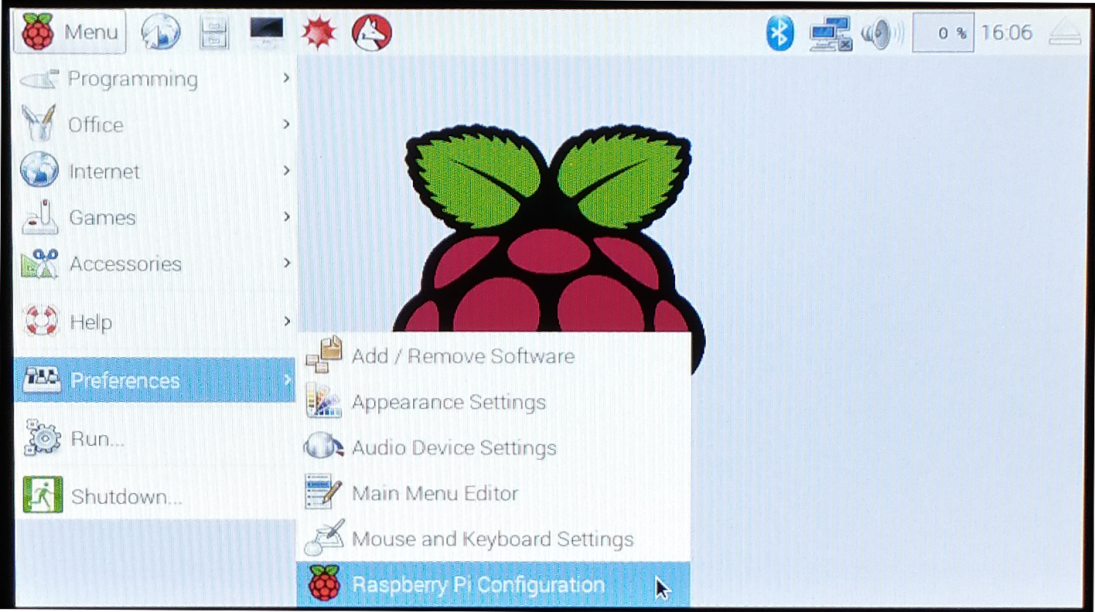
in the popup that appears and the Raspberry Pi will reboot. Because Raspbian is a Linux OS, you will see text scrolling by that relates to services that are being started by the OS.Now that we have installed Raspbian and have it booting into the graphical environment we can start configuring the Raspberry Pi for our purposes. To be able to configure the Raspberry Pi, the graphical environment has a utility tool installed, which eases up the configuration called Raspberry Pi Configuration:
Menu
button on the top left, navigate to Preferences
, and press the Raspberry Pi Configuration
menu option, as shown in the following screenshot:Raspberry Pi Configuration
tool Menu
option a popup will appear with the graphical version of the raspi-config
command-line tool. In the graphical popup we see four tabs explaining different parts of possible configuration options. We first focus on the System tab, which allows us to:Password
Hostname
, which helps to identify the Raspberry Pi in the networkBoot
method to To Desktop
or the CLI
Network at Boot
optionpi
and the password is set to raspberry
. Because these are the default settings, it is recommended that we change the password.Change Password
button and enter a newly chosen password twice, Once to set the password and the second time to make sure we have entered the new password correctly.Ok
when the password has been entered twice.Try to come up with a password that contains capital letters, numbers, and some strange characters, as this will make it more difficult to guess.
RASPI3JAVA
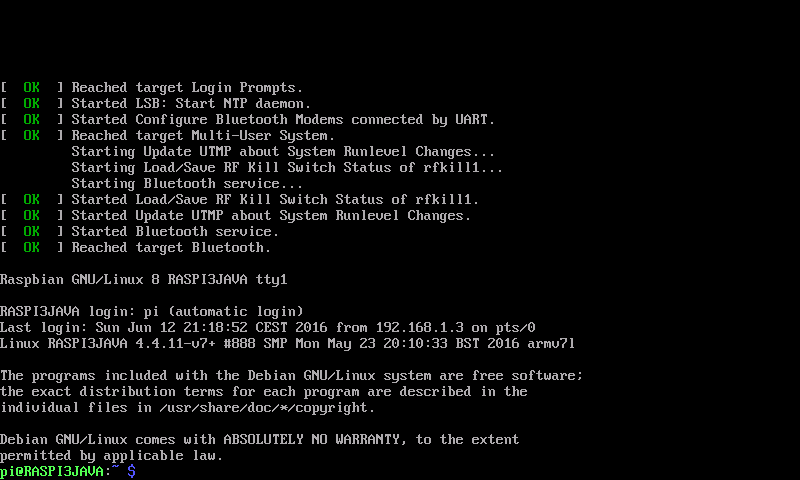
, which helps me to identify the Raspberry Pi to be used for the book.The hostname is used on the CLI, so you will immediately identify this Raspberry Pi when you log in.
radio
button that says To CLI
. The next time we reboot, we will be shown the CLI.Network at Boot
option to have it waiting for the network. Later on in the book we will be creating network-based services and we will be logging in from remote locations. Having the network ready before any service requiring a network connection is a good practice.Wait for network
.We have set some default settings, which sets some primary options to help us identify the Raspberry Pi and change the boot mode. We will now be changing some advanced settings that enable us to make use of the hardware provided by the Raspberry Pi:
Interface
tab, which will give us a list of the available hardware provided. This list is as follows:Camera:
The Official Raspberry Pi camera interfaceSSH:
To be able to log in from remote locationsSPI:
Serial peripheral interface bus for communicating with hardwareI2C:
Serial communication bus mostly used between chipsSerial:
The serial communication interface1-Wire:
Low data power supplying bus interface conceptual based on I2CRemote GPIO
Enabled
radio box behind Camera
. We will be deploying our applications immediately from the editor. This means we need to enable the SSH
option. By default this already is, so we leave the setting as it is. If the SSH
option is not enabled, tick the Enabled
radio
button behind the SSH
option. For now, you can leave the other interfaces disabled as we will only enable them when we need them.Performance
tab to open the performance options.512
behind the GPU Memory
option; there is no need to enter the text MB
. The memory on the Raspberry Pi is shared between the system and the GPU. Having this option set to 512 MB results in 512 MB available for the system. I can assure you that this is more than sufficient.
Localisation
tab to show the options applicable to the location the Raspberry Pi resides in. We have the following options:Set Locale
: Where you set your locale settingsTimezone
: The time zone you are currently inKeyboard
: The layout of the keyboardWiFi Country
: The country you will be making the Wi-Fi connection inSet Locale
button:Language
to en (English)
Country
to US (USA)
Character Set
to UTF-8
OK
button to continue.As this needs to build up the Locale settings this can take up to about 20 seconds to set up. You will be notified with a small window when this process is finished.
Set Timezone
button and select your appropriate Area
and Location
from the drop-down menus. When done, press the OK
button.Set Keyboard
button to open up a popup showing the keyboard options. Here, you are able to select your country and the keyboard layout available for this country. In my case, I have to select United States
as the Country
and the Variant
as English (US, with euro on 5)
.input
field below the Country
and Variant
selection lists. Press the OK
button when you are satisfied with your selection.
Set WiFi Country
button to have the Wifi Country Code
shown, which provides us the list of available countries for the Wi-Fi connection. Press the OK
button after you have made the selection. We are now done with the minimal Raspberry Pi system configuration.OK
in the settings window to have all our settings stored and press No
in the popup that follows that says a reboot is needed to have the settings applied as, we are not completely done yet.We will now set up the Wi-Fi on the Raspberry Pi. If you want your Raspberry Pi connected with a network cable, you can skip this section and head over to the Set fixed IP
section:
Network
icon, which is at the top of the screen between the Bluetooth
and Speaker Volume
icons.If you have any trouble connecting to your wireless network without any messages, log in to your router and change the Wi-Fi channel to a channel lower than channel 11.
OK
button you will see the icon changing from the two network computers to the wireless icon, as it it trying to connect to the wireless network.
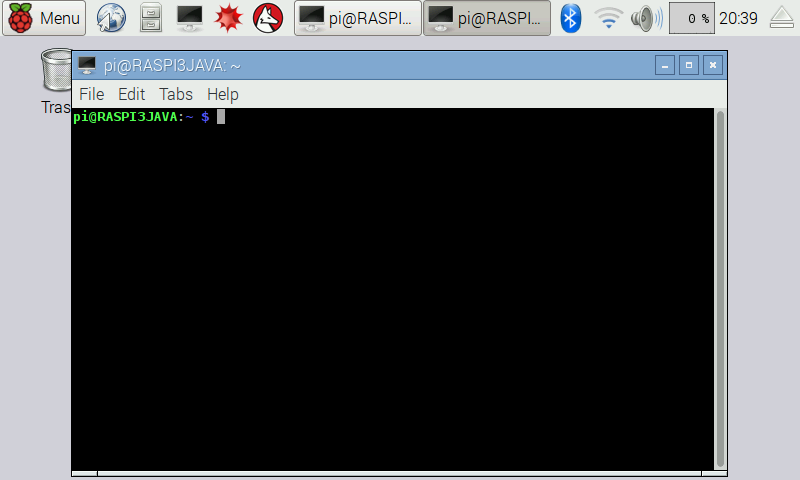
computer screen
icon at the top in the menu bar. When we hover over this icon it shows the text terminal. Press this icon to open up a terminal.Do you notice the hostname we set earlier? This is the same prompt as we will see when we log in remotely.
sudo iw dev wlan0 set power_save off
wlan0
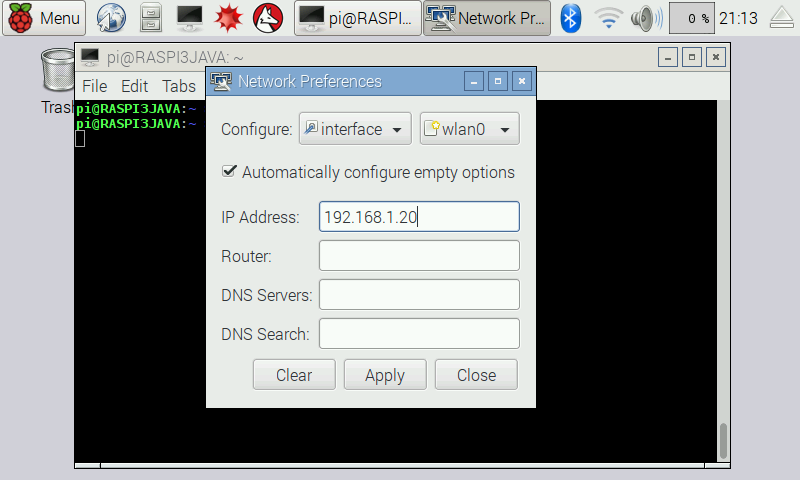
(wireless device) won't enter power save mode and will stay connected to the network.We are almost done with setting up the Raspberry Pi. To be able to connect to the Raspberry Pi from a remote location we need to know the IP address of the Raspberry Pi. This final configuration step involves setting a fixed IP address into the Raspberry Pi settings:
WiFi Networks (dhcpcdui) Settings
option.nterface
next to the Configure
option. When interface is selected, we select the wlan0
option in the drop-down menu next to the interface selection.If you have chosen to use a wired connection instead of the wireless connection you can select the eth0
option next to the interface
option.
Apply
and Close
.startx
Change the font size
Change margin width
Change background colour